How To Make A Shower Drain?
A Shower Drain may look like a simple grate on the floor, yet behind that minimal face is a precision product that manages high flow rates, blocks odors, integrates with waterproofing systems, and endures decades of humidity and cleaning chemicals. If you’ve ever wondered how to make a shower drain that is beautiful, safe, and compliant with building codes, this guide breaks down the process from concept to production.
1) Define the Goal: What a High-Performance Shower Drain Must Do
Before metal is cut or molds are opened, clarify the performance targets. A professional-grade drain should:
Move water fast without pooling. Typical domestic flow targets are 24–48 L/min; spa or dual-head showers may require 60–90 L/min.
Stop odors and insects using a P-trap or a mechanical/silicone membrane seal that closes when dry.
Integrate with waterproofing (liquid membrane, sheet membrane, or mortar bed) using a flange, clamp ring, or bonding fleece.
Resist corrosion from hard water, cleaning agents, and salt-air (choose 304 or 316 stainless steel depending on environment).
Be easy to service (lift-out grate, removable hair strainer, accessible trap cup).
Adapt to site tolerances with adjustable feet, height shims, and leveling screws.
Meet standards (e.g., ISO9001 quality systems, CE conformity, and local plumbing codes for outlet size—commonly 50–75 mm/2–3").
Setting these benchmarks informs every downstream decision—materials, thickness, tooling, and inspection.
2) Design the Product: Types, Dimensions, Hydraulics, and CAD
Choose a Drain Architecture
Linear channel: a long, narrow body placed at the wall or threshold. Pros: one-way floor slope, ADA/walk-in friendly, high flow, minimalist styling.
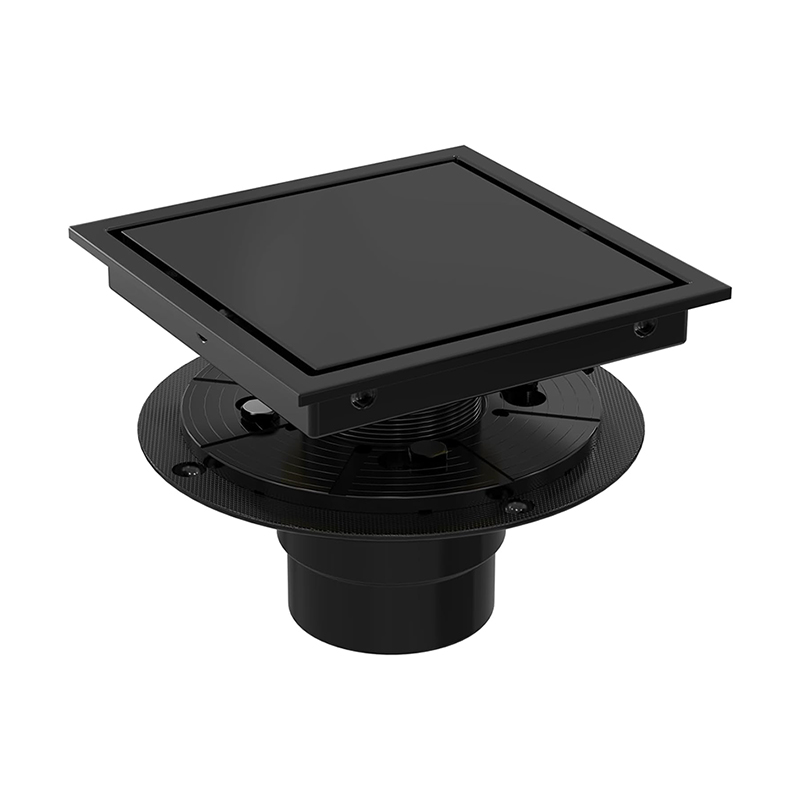
Square/round point drain: compact center drain with four-way floor slope. Pros: fast installation, classic look, economical.
Invisible (tile-in): uses a tray or insert that accepts tile for a seamless finish.
Slim profile: reduced body height for renovations with limited screed thickness.
Decide Core Dimensions
Body length (linear): 300–1500 mm (12–60"). Best-sellers: 600, 700 (≈27.17"), 800, and 900 mm.
Outlet: 50 mm (2") for most residential; 75 mm (3") for high-flow or commercial.
Body height: 22–35 mm for slim; 45–70 mm for standard.
Material thickness: 1.2–2.0 mm for the body and grate; 2.0 mm offers premium rigidity.
Engineer for Flow
In CAD (SolidWorks/Inventor), model the channel slope (1–2%), outlet venting path, and grate open area (typically ≥30% of surface). Simulate flow with basic CFD or empirical formulas:
Q = A × v (target velocity 0.8–1.2 m/s to minimize noise and splashing).
Include hair strainer loss: design generous bypass area so capture doesn’t strangle flow.
Detailing for Installers
Add:
Leveling feet (M6/M8 screws) or U-shaped brackets.
Membrane flange with roughened surface or welded fleece.
Lift-out hook recesses for grates.
Radius edges to avoid tile chipping and improve hand safety.
Export manufacturable drawings with tolerances (e.g., ±0.2 mm for slot widths, ±0.5 mm for overall length; flatness ≤0.8 mm/600 mm grate).
3) Select Materials & Components: What Goes Into a Premium Drain
Metals
304 stainless steel: standard for indoor bathrooms; excellent corrosion resistance and weldability.
316 stainless steel: for coastal projects, spas, or chlorine exposure.
Brass (occasionally used for threaded fittings), ABS/PVC for trap cups, and silicone for self-sealing membranes.
Surface Treatments
Brushed (hairline), polished, or backed lacquer for economy lines.
PVD coatings (matte black, PVD gold, grey, rose gold) for high wear and color depth.
Functional Parts
Grate/top: patterned slots, wedge wire, or tile-in tray.
Channel/body with welded outlet.
Odor seal: water trap cup or gravity-closing silicone membrane.
Hair strainer: lift-out basket with 0.8–1.2 mm perforations.
Gaskets & bonding fleece for waterproof tie-in.
Fasteners: A2/A4 screws; plastic caps to avoid galvanic corrosion against tile trims.
A common premium spec is 304 stainless steel, 2.0 mm thick, body size 690×28×25 mm (≈27.17×1.1×1"), finished in brushed or PVD colors.
4) Manufacture the Drain: From Sheet Metal to Finished Product
Below is a factory-grade process that balances precision and throughput (fit for brands seeking OEM/ODM).
A. Blanking & Cutting
Procure coils/sheets (with mill certificates). Inspect thickness and surface.
Laser cut or CNC punch the body blanks and grate patterns. Laser ensures crisp slot edges and fast design changeovers.
Deburr with tumbling or brush belt to remove sharp edges.
B. Forming
Bend the channel on a CNC press brake to form the U-profile with internal slope (or deep draw for one-piece cup bodies).
Form the grate—flat or slightly cambered to avoid rocking.
Roll radius edges (≥1 mm) for comfort and tile-safe handling.
C. Welding & Assembly
TIG weld the outlet spigot to the channel; welds should be continuous to prevent micro-leaks.
Spot-weld leveling tabs/brackets; keep heat input low to preserve flatness.
Passivate (nitric/citric bath) to restore chromium oxide layer on welds.
Install odor-seal module (membrane or trap cup) and hair basket.
Add bonding fleece or clamp rings to the flange where specified.
D. Finishing
Surface finish: hairline brushing in one direction; mirror polish for decorative lines.
PVD coating (optional): vacuum deposit TiN/TiCN variants for matte black, gold, or grey. Test adhesion with cross-hatch.
Ultrasonic clean to remove oils; dry in hot air tunnel.
E. Quality Control (In-Process)
Dimensional checks: go/no-go gauges for outlet, slot width, overall length.
Leak & flow test: pressurize or run-off at 40–60 L/min; verify no weeping at welds.
Load test: grate deflection under 1.5 kN point load (suitable for residential); increase for commercial.
Salt-spray (ASTM B117) for coated parts and fasteners.
Edge-safety scan: ensure no burrs that could cut waterproof layers or installer hands.
F. Packaging & Traceability
Fit protective film on grate and flange.
Include height shims, hook tool, installation manual, and barcode/lot number for after-sales tracking.
Carton with corner guards; for PVD colors, use anti-abrasion sleeves to avoid rubbing marks.
Production at scale: an automated line with 50+ machines can ship 100,000 pcs/month, with a typical 30-day lead time for bulk orders and 48-hour dispatch for stocked SKUs.
5) Install & Waterproof: Field Integration That Prevents Callbacks
Even the best drain fails if it’s installed poorly. Provide installers with a concise, illustrated guide; below is the proven sequence.
Substrate & Layout
Position the drain (wall or threshold). Confirm outlet height relative to trap and main line.
Leveling: use adjustable feet to set the channel perfectly straight; allow for tile thickness plus thin-set (usually 10–14 mm).
Slope the shower floor at 1–2% toward the channel (one-way for linear; four-way for point drains).
Waterproofing Tie-In
For sheet membranes: bond fleece-lined flange with approved adhesive; overlap per membrane brand instructions.
For liquid membranes: prime stainless steel, then embed mesh at the flange; apply coats to specified dry mil thickness.
Seal corners with pre-formed inside/outside pieces to eliminate pinholes.
Tiling & Finishing
Dry-fit tiles; maintain even gap around the grate frame (typically 3–5 mm).
Use non-staining grout (epoxy or high-quality cementitious). Avoid acid cleaners for 7 days after grouting.
Set the grate/tile-in tray flush with surrounding tile. Verify water runs freely with a hose test.
Commissioning
Fill the trap or prime the membrane seal with water. Run the shower at full flow; check for pooling and leaks.
Hand over care instructions: lift-out cleaning, no harsh acids, periodic membrane/trap rinse.
6) Sustain the Product: Testing, Certification, Maintenance & Customization
Certification & Reliability
Operate under ISO9001 quality management; document a 14-step QC plan from incoming metal to final pack.
Conform to CE and regional plumbing codes (outlet size, odor seal depth, flow).
Maintain 100+ appearance patents and practical designs to protect your catalog.
Long-Term Maintenance for End Users
Remove and clean the hair strainer weekly in busy households or commercial facilities.
Rinse the trap cup and silicone membrane monthly; replace gaskets annually if water quality is harsh.
For PVD finishes, use pH-neutral cleaners and microfiber towels; avoid steel wool.
Customization (OEM/ODM)
Working with an experienced sanitary-ware manufacturer enables:
Lengths from 300–1500 mm; custom outlets (center/offset; 50 or 75 mm).
Profiles: standard, ultra-slim, or deep channel for high flow.
Tops: pattern grates, wedge wire, slot, or tile-in designs.
Finishes: Brushed, Chrome, Matte Black, PVD Gold, PVD Grey, PVD Rose Gold—color-matched to faucets and trim.
Branding: laser-etched logos, retail boxes, QR manuals, and SKU barcodes.
Project solutions: stainless niches, towel warmers, and bathroom hardware to complete the set.
With more than a decade of OEM/ODM experience and a monthly output exceeding 100,000 pcs, a modern sanitary-ware partner can deliver fast prototypes, stable quality, and on-time global shipping to North America, Europe, and ASEAN markets.
Conclusion
Making a shower drain the right way is equal parts engineering, materials science, and installer empathy. Start by defining flow and odor-seal requirements, design for waterproof integration, choose corrosion-proof metals, and manufacture with tight tolerances and clean welds. Pair that with clear installation guidance and robust QC—and you’ll supply drains that look refined, drain fast, and last for years.
Whether you’re developing a new Linear Drain line, a minimalist invisible/tile-in series, or an ultra-slim renovation model, the same principles apply: precise design, premium stainless steel, tested finishes, and serviceable internals. Done right, your drain disappears visually—and the only thing users notice is a safe, dry, and beautiful shower.
Previous: How To Make A Wall Niche?


